Posts

Showing posts from September, 2015

Creating RFComm Connection with HC-05

Command to do this sdptool add --channel=1 SP sudo rfcomm bind rfcomm0 20:14:04:09:27:41 Fill the /etc/bluetooth/rfcomm file sudo rfcomm release 0 sudo rfcomm connect 0 You will get something like Connected /dev/rfcomm0 to 20:14:04:09:27:41 on channel 1 Press CTRL-C for hangup In another tab type screen /dev/ttyrfcomm0

Error: creating lock file: /var/lock/LCK..ttyACM0: File exists

If you get this error anytime while you are working with arduino, the solution to this type the following in the command line: sudo rm -f /var/lock/LCK* This basically happens when a process is still using /dev/ttyACM0 and other process is trying to access this. 

HC-05 Bluetooth AT Commands

HC-05 works in two modes: 1. Command Mode: Where it accepts AT Commands 2. Data Mode: Where it transmits and receives data. Default: Data Mode Format of the Command Mode : AT+<Parameter> In the previous post we have seen parameter field can be VERSION, STATE, UART, NAME and ROLE. In this post we will be seeing some more commands The commands varies based on the role(slave/master) in which it is present which can be found by typing AT+ROLE command. HC-05 In Slave Role: This can be set by typing AT+ROLE=0 1. AT+ADDR: Displays the MAC Address Eg: +ADDR:2014:4:92741 2. AT+RMAAD: This will clear all the paired devices and the return of the command will be OK 3. AT+ORGL:  This will be resets to defaults and return of the command will be OK which means it is successful HC-05 in Master Role: This can be set by typing  AT+ROLE=1 1. AT+INIT: Start serial port profile(SPP). If you get return value as 17 , it means its already loaded 2. AT+CMODE=0 : Allow con

Arduino HC-05 (Bluetooth) Interfacing

Image
In this post we will access Arduino over Bluetooth either through ur PC or Android device. This will be useful in case when you have sensors interfaced to ur arduino board and want to send this information to ur Mobile. Things needed to do this experiment: 1. Arduino Uno 2. HC-05 Connections: 1.Connect TX of HC-05 to TX of Arduino 2.Connect RX of HC-05 to RX of Arduino 3.Connect GND of HC-05 to GND of Arduino 4.Connect VCC of HC-05 to 5V of Arduino Power up the device either by connecting USB or a battery. Now you can scan this on your PC or Android device to see whether your device is listed out. For example in Ubuntu I can run  hcitool scan and it lists out all the Bluetooth devices. Now you can see a device with name HC-05 in the list. This means your HC-05 is working properly. You can also check the same on your Android device. Now you have to pair your Ubuntu Bluetooth with HC-05. In order to achieve this: 1.Go to Bluetooth Icon, and click o

Arduino HC-05(ZS-40) AT Commands

Image
The Bluetooth Module HC-05 can be act as Master and Slave. By default it is a master . It can also be configured to have different baud rates:9600, 19200,38400 etc. By default the baud rate is 38400. If you want to modify these settings. It can be acheived by sending AT Commands to the HC-05 Module. In order to send AT commands , you have to connect HC-05 Module to an USB-to-TTY module. If you dont have that like me and have an arduino board then you can use it for sending AT Commands. In order to achieve this, Open Arduino IDE Upload an empty sketch to the Arduino void setup() { } void loop() { } Connections: 1. Connect RX pin of Arduino to RX pin of HC-05(Not the other way:RX to TX) 2. Connect TX Pin of Arduino to TX pin of HC-05 . Don't connect power then before this, you have to switch HC-05 Module to AT Mode. It can be achieved in two modes: 1.One is to hold the switch and then apply the power to it, i.e. connecting VCC of Arduino to HC-05 VCC an
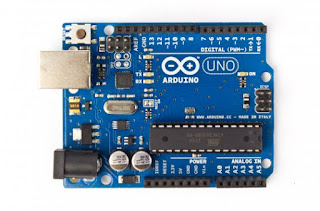
Getting Started with BLE Mini

Image
Hi Friends. Two days back I have ordered BLE Mini from FabToLab, it got delivered today. https://www.fabtolab.com/redbearlab-ble-mini It costed around 1600 Rupees BLE Mini is board developed by RedBear Lab and will be useful if you want to include Bluetooth Low Energy Version 4.0 on your project. It requires only a serial port for communication. So any board that has a UART Interface will work with it including Arduino, Raspberry Pi, Netduino and BeagleBone. It uses the CC2540 IC which comes from Texas Instruments. The firmware can be easily uploaded by using USB (Micro USB Connector, the one which comes with most Android phones). Note: Micro USB Connector cable will not come with the BLE Mini. The next following posts will be on different things that can be done  using  BLE Mini.